Cluster Upgrade from 4.30 to 4.31
This guide will lead you through the steps specific for upgrading a NetEye Cluster installation from version 4.30 to 4.31.
During the upgrade, individual nodes will be put into standby mode. Thus, overall performance will be degraded until the upgrade is completed and all nodes are revoked from standby mode. Granted the environment connectivity is seamless, the upgrade procedure may take up to 30 minutes per node.
Warning
Remember that you must upgrade sequentially without skipping versions, therefore an upgrade to 4.31 is possible only from 4.30; for example, if you have version 4.27, you must first upgrade to the 4.28, then 4.29, and so on.
Breaking Changes
Upgrade of Elastic Stack to version 8.8.2
In NetEye 4.31, we upgraded Elastic Stack from version 7.17.9 to version 8.8.2, which comes with several breaking changes.
In order to facilitate the upgrade, presented below is a list of breaking changes that might have impact on your NetEye installation if you have the SIEM module installed. Before proceeding with the upgrade, please read this section carefully as well as the Elastic official breaking changes documented in the Official Elastic Documentation
Logstash Deprecations and Warnings
With Logstash 8.8.2, all deprecations and warnings reported in Logstash 7.17 will be treated as errors, possibly leading to malfunctions. For this reason, we strongly recommend to review all deprecations and warnings reported by Logstash 7.17 to ensure they have been addressed in a proper way.
ECS Compatibility in Logstash
From NetEye 4.31, ECS Compatibility will be globally enabled in Logstash. For more information on this topic, please visit the Elastic Common Schema (ECS) Reference.
In particular, this change might concern your NetEye installation for the following reasons:
The Logstash index template is now ECS compatible. This means that any external agent sending data to the Logstash main pipeline must now send logs that are ECS compatible.
The Logstash default index has changed. The logs processed by the Logstash main pipeline will now be stored in the
logs-logstash-masterdata stream, which is the new recommended way to store time series data. The default index was previouslylogstash-*.This means for example that you should migrate your Kibana visualizations to point to the new index, otherwise the visualizations will only display old Logstash data.
To include both old data and new data in your Kibana Analytics objects (i.e. the objects shown in the screenshot below), you can create a new data view that includes old data as well as new data and use this index pattern in your visualizations. For example, the index pattern can be set to:
logstash-*,logs-logstash-master
GeoIP Filter in ECS Compatibility mode requires a target when
sourceis not anipsub-field. For more information, please refer to the Geoip filter plugin documentation.If your installation contains custom Logstash filters in which the GeoIP Filter is used, please make sure that the filter either sets
sourceto anipsub-field or specifies atarget.
Elasticsearch Curator
The Elasticsearch Curator, which could be used as a snapshot / backup utility, is no longer supported by NetEye.
In particular, the NetEye scripts that relied on the Elasticsearch Curator have been removed:
/usr/share/neteye/backup/elasticsearch/elasticsearch-backup.sh
/usr/share/neteye/backup/elasticsearch/elasticsearch-indices.sh
/usr/share/neteye/backup/elasticsearch/elasticsearch-restore.sh
If you were using the Elasticsearch Curator for your Elasticsearch data backups, please switch to the official backup functionality of Elastic. For more information please refer to Backup & Restore.
If you are not using the Elasticsearch Curator in any way, after the upgrade to NetEye 4.31 you can remove it from your Nodes with the command:
# dnf remove elasticsearch-curatorWarning
Please do not execute this command before upgrading to NetEye 4.31, otherwise this will remove other necessary RPMs
Beats data stream
Beats are now handled as data streams in Elasticsearch. This means that any Beats (or Logstash output) writing directly to Elasticsearch should now not include the date in the output index. They should instead just specify the name of the data stream.
For example if a Filebeat instance is writing in the index filebeat-%{[agent][version]}-%{[event][module]}-%{+YYYY}.%{+MM}.%{+dd},
after the upgrade it should write instead in filebeat-%{[agent][version]}-%{[event][module]}.
Elastic APM activation
Since NetEye 4.31, the Elastic APM functionality will not be enabled by default and needs a small manual procedure to enable it. If you use Elastic APM, please perform the following procedure, to add the APM integration, before upgrading to NetEye 4.31. Performing the procedure before upgrading allows you to avoid losing the APM data generated during the upgrade.
Warning
If you do not perform the manual procedure, also the APM data coming from Tornado will not be saved anymore.
Access Kibana home page by navigating to Log Analytics
Select Add integrations and then Elastic APM
Click on the APM Integration button
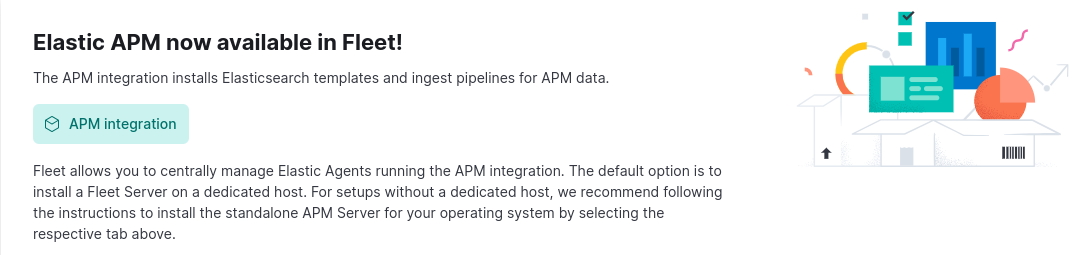
Click on Add Elastic APM button

Set the name of the integration to
apm-neteyeLeave all other settings to their defaults and scroll down to section
Apply to agent policyClick on Create agent policy, set the policy name to
apm-setupand remove the flag Collect system logs and metrics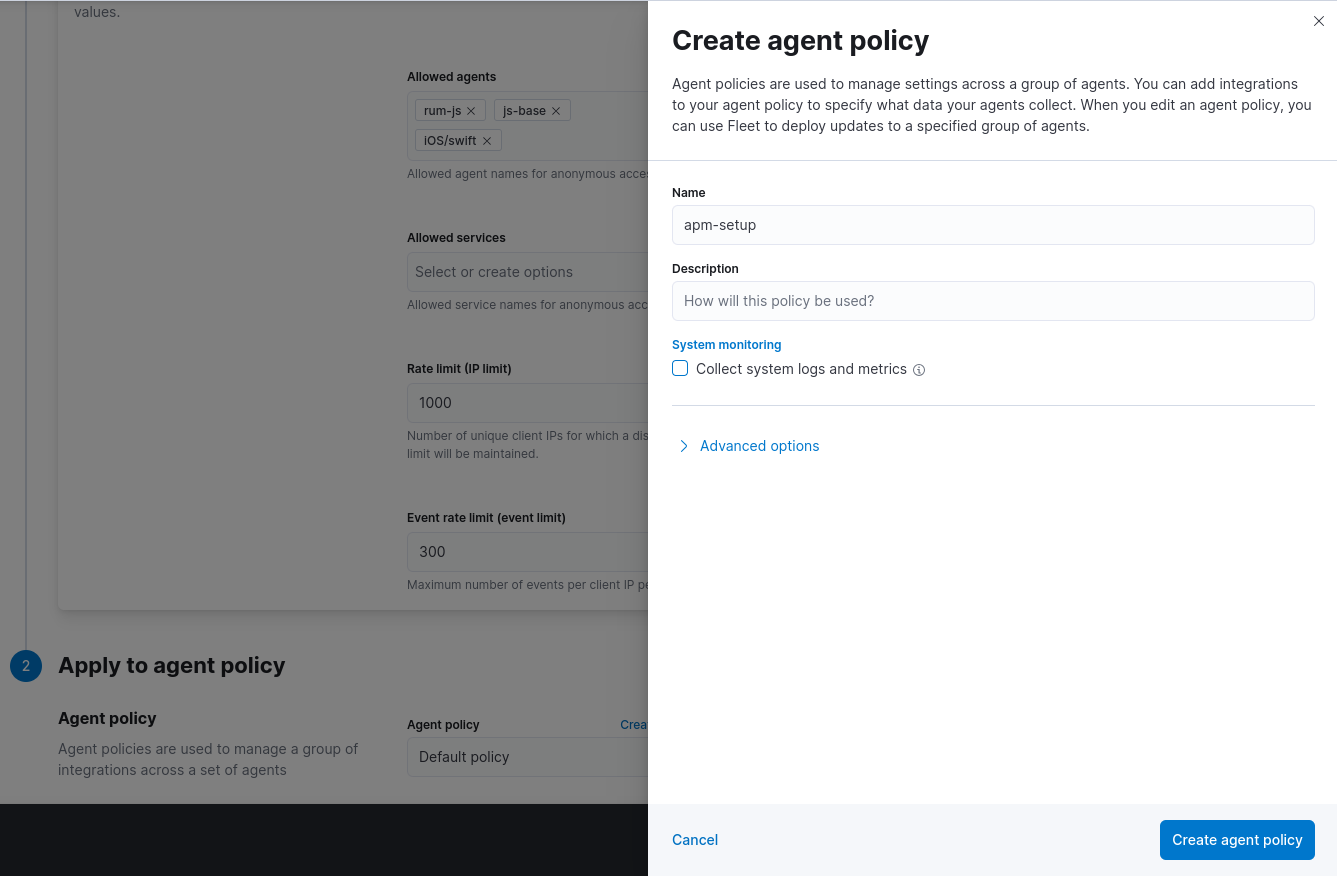
Click on Create agent policy, then on Save and continue and afterwards on Add Elastic Agent later
If you are on a Single Node environment you should also adapt the Index Templates generated by the APM integration to allow APM indexes to have no replicas (you can skip this step in cluster environments). To do this you should:
Navigate to
Search for the customizable Component Templates of APM with
apm "@custom"Edit each of the resulting Component Templates by inserting in Index Settings the following content:
{
  "index": {
    "auto_expand_replicas": "0-1"
  }
}
Elastic Security
During the upgrade, detection rules will be disabled and you need to re-enable them after the upgrade. For more information about the procedure and other notable changes related to the Elastic Security, including privileges, please consult the official documentation.
Prerequisites
Before starting the upgrade, you should read very carefully the latest release notes on NetEye’s blog and check out the features that will be changed or deprecated after the upgrade.
All NetEye packages installed on a currently running version must be updated according to the update procedure prior to running the upgrade.
NetEye must be up and running in a healthy state.
Disk Space required:
3GB for
/and/var150MB for
/boot
If your NetEye has the SIEM feature module installed, the following prerequisites need to be satisfied to guarantee a smooth upgrade to the latest Elastic 8 version:
Elasticsearch version 8.8 is only compatible with Elastic Agent and Beats whose version is in the range
7.17.x - 8.8.x. For this reason, before upgrading please ensure that all your Elastic Agents and Beats are updated to version7.17The critical issues reported by the Kibana Upgrade Assistant must be resolved.
You can inspect the issues reported by the Kibana Upgrade Assistant by visiting
https://<hostname>/neteye/kibana/kibana/app/management/stack/upgrade_assistant/overview.Make sure to change
<hostname>with your actual hostname.Warning
The second step reported by the Kibana Upgrade Assistant, namely Migrate system indices, will be performed automatically by the NetEye upgrade procedure, to ensure it behaves correctly with the installed index templates. For this reason, it must not be performed manually.
The warnings reported by the Kibana Upgrade Assistant must be analyzed and resolved if possible.
You can inspect the warnings reported by the Kibana Upgrade Assistant by visiting
https://<hostname>/neteye/kibana/kibana/app/management/stack/upgrade_assistant/overview.Make sure
<hostname>reflects your actual hostname.Note that Elastic does not prevent you from upgrading if there are unresolved warnings, but for the upgrade to be as smooth as possible, we introduced a feature flag that will prevent the NetEye upgrade if not enabled.
Before enabling the feature flag, you should carefully analyze the warnings reported by the Kibana Upgrade Assistant, fix the warnings whenever possible, and understand the implications that the unresolved warnings will have on your installation after the upgrade.
Once you inspect all the warnings, the feature flag that prevents the upgrade can be enabled via .
Note
Due to the Kibana Upgrade Assistant implementation, some of the reported warnings will not disappear even after fixing them and some other warnings can be ignored. Here is an incomplete list of the warnings that can be ignored:
File and/or native realms are enabled by default in next major release.Setting [xpack.monitoring.collection.enabled] is deprecatedSetting "server.rewriteBasePath" should be set when using "server.basePath"Kibana's logging format is changing in 8.0The "xpack.reporting.roles" setting is deprecated"xpack.security.session.idleTimeout" is now 8 hours"xpack.security.session.lifespan" is now 30 days
Warning
During the upgrade to Elastic Stack 8, the monitoring data for the nodes that are already updated to Elastic Stack 8 won’t be shown in the Stack Monitoring view and an alert will be shown until the master node of the Elasticsearch cluster is a node running Elasticsearch 8. However, you will still be able to see the data in the top section, including those related to the shards relocation.
1. Run the Upgrade
The Cluster Upgrade is carried out by running the following command:
cluster# (nohup neteye upgrade &) && tail --retry -f nohup.out
Warning
If the SIEM feature module is installed and a new version of Elasticsearch is available, please note that the procedure will upgrade one node at the time and wait for the Elasticsearch cluster health status to turn green before proceeding with the next node. For more information, please consult the dedicated section.
After the command was executed, the output will inform if the upgrade was successful or not:
In case of successful upgrade you might need to restart the nodes to properly apply the upgrades. If the reboot is not needed, please skip the next step.
In case the command fails refer to the troubleshooting section.
2. Reboot Nodes
Restart each node, one at a time, to apply the upgrades correctly.
Run the reboot command
cluster-node-N# neteye node reboot
In case of a standard NetEye node, put it back online once the reboot is finished
cluster-node-N# pcs node unstandby --wait=300
You can now reboot the next node.
3. Cluster Reactivation
At this point you can proceed to restore the cluster to high availability operation.
Bring all cluster nodes back out of standby with this command on the last standard node
cluster# pcs node unstandby --all --wait=300
cluster# echo $?
0If the exit code is different from 0, some nodes have not been reactivated, so please make sure that all nodes are active before proceeding.
Run the checks in the section Checking that the Cluster Status is Normal. If any of the above checks fail, please call our service and support team before proceeding.
Re-enable fencing on the last standard node, if it was enabled prior to the upgrade:
cluster# pcs property set stonith-enabled=true
4. Additional Tasks
In this upgrade, no additional manual step is required.